Beginning PowerPoint PowerPoint is part of Microsoft Office 98. Open Microsoft Office. Open PowerPoint. Design: Click on the button "Template", then click "OK". Click on the "presentation designs" folder if it is not already in front. As you click once on each design icon, you will see a preview of that design. When you have one you want, click "OK". Choose an "auto layout". I usually pick the second one, "bulleted list". You can add other layout pages later, especially if you decide you want to add a photograph. Click "OK". Outlining: You will see a full screen slide of your choice. I usually start my presentations by making an outline of what I want to appear. In the lower left are 5 icons. The second one is composed of horizontal lines and is the "outline" option. Click on it. You will see a fairly empty screen with a small 1 in front of your cursor. The 1 stands for slide (or page) 1. Start typing your outline remembering that each number is the heading of a new page. To make the bulleted items under a page title press "return" and then "tab". Once you press "tab" you will stay in bulleted items until you wish to go to the next slide (or page). To do this you press the left arrow which is about an inch down from the top of your screen on the far left. Your screen will begin to look like this:
Remember, the numbers won't show on the final slide. Over on the right will be a little box that will give you a preview of what your final slide will look like. Use this to be sure you are not writing too much. Font Size: This is a good time to change the size of your font. You do this pretty much the same as in Microsoft Works. Highlight the part you want to change. Go to the spot on the menu/tools bar with the numbers and make the change. I generally use 60 point for headings and 44 for my bulleted items. If you go smaller the audience may not be able to read what is written. Saving: Under "file" select "save as". Navigate to the area where you want to save your file. I would suggest making a folder of your PP presentations and keeping them together in the Office folder. Give it a name that you can remember (in case you have to use "find" to search for it later). For mine above I would probably call it... "sci.ch2.kingdoms". This would let me know the subject and help me find it quickly when I wanted it. View all slides: At the bottom of your screen you will see an icon with four small squares. (This is called the slide sorter view) Clicking this will let you see all your slides at once.Later you may want to use this view to change the position of slides in your presentation. You can also add new pages (such as pages that let you add a photo) here. You can control slide transitions and animations from slide sorter also. To preview your slide show: Go to "view" on the menu/tool bar on the top of the page. Pull down to "slide show" and you will see the whole thing slide by slide. Mouse click to turn pages. Be sure to save again before quitting. |
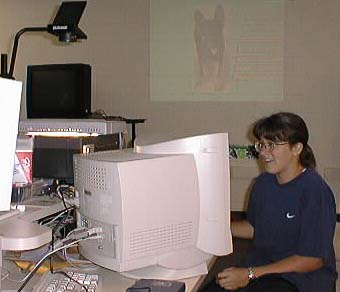
Adding Final Touches to PowerPoint Slide Transitions: When you move from slide to slide you can have something happen. Click on "slide Transition" in the "slide show" menu. Slide Animations: When in the slide sorter view go to the slide sorter toolbar and select "animations". This controls how the bulleted items appear. Try them all and choose the one you like. If you want to have a serious presentation (such as funeral practices in Italy) I would suggest you have the bulleted items "drop in" rather than "drive in" with all the sound effects. "laser text" comes in sounding like a machine gun. It will keep the kids alert. There are many more things which can be done with PowerPoint, but this page is about getting started. It is really a powerful teaching tool. And the best part is you can save your presentations. Using PowerPoint in the Classroom Students make outlines: One thing I have done is let the students help make the outline as we read a chapter. Later we can use this outline as a review. Student made presentations: Students can make presentations using PowerPoint. After they have written a report which they will present to the class, they could use PowerPoint to help with the presentation. Remind them that only the major points need to be on the screen. They will be talking also. Photographs and scanned items can be added. Below, Erica is making a presentation to the class. (She is using HyperStudio, but a Power Point presentation would be similar)
Hyperlinks: You can make hyperlinks to go to hidden pages, or even to the Internet (assuming your computer is connected)--just type in a URL. Use Your Office Assistant: The little Office Assistant will often jump up and down trying to get your attention. Click to find out what she wants. I've gotten some good (and also some useless) advice this way. You can put your Powerpoint presentations on your web: but I'm not sure it is worth it. It takes a great deal of space, and not all parts will work. HyperStudio presentations can also be placed on your web. All the parts work, but not many browsers are set up to receive HyperStudio. Each person receiving the presentation will need to have downloaded HyperStudio player and Quick Time. HyperStudio Stacks by students |